June 17, 2008

Honey Banana Muffins


Have you ever left a bunch of fruit like bananas or pears sitting around your house until the bananas are black and you can't pick up the pears without putting your thumb through the skin? No? Because that's pretty much a weekly occurence in this house. It's a terrible habit I've taken with me into the beginning of my life away from home, much to Anders' shagrin, I'm sure. In any event, in true Gulewitsch-Broadley-Malott household fashion, we left three bananas and three pears in our kitchen for about a week. Mum was going to make banana bread with them, because that's what we usually do when we find almost-black bananas in our kitchen. This time, though, I decided to look up something different. We let bananas go bad so often and I can only eat so much damned banana bread.
What I found was honey banana muffins. It looked good to me because it has no added fat (like oil or butter), no sugar (only honey, which I somehow consider healthier) and applesauce. Of course, I didn't actually have applesauce, but I did have really soft pears and a food processor. And, naturally, I strayed from the original recipe quite a lot. I really see recipes as guidelines. Sort of like the pirates' code.

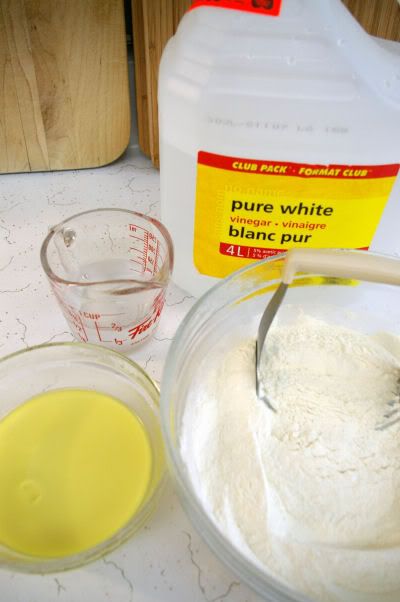
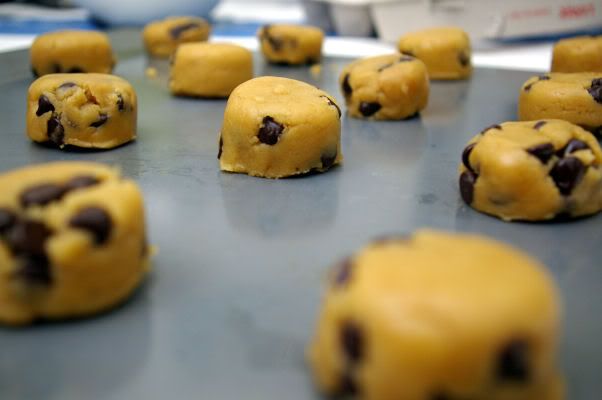
I started by pulling out the lovely Kitchenaid mini food processor that has never been used.

I nuded up my pears and quartered them, taking the cores out as I went:


Then, pulsed them until they were fairly smooth, but with some solid bits remaining:


Then, I roughly mashed up the three bananas and mixed that and the pears with two eggs and some honey:


The dry ingredients simply consisted of flour (supposed to be partly whole wheat, but I was sad to discover we were out), baking soda, nutmeg and cinnamon.

I omitted the salt because it's bad for your brain!

And then I let the wet and the dry meet and they had a grand ol' time getting to know each other:

It went very smoothly, if you know what I mean.

I decided to go with the suggestion in the recipe (shock, awe!) and grease the muffin tin rather than line it. With no oil in the batter, I bet these would have stuck like crazy and we would have had to eat the paper to get all the muffiny goodness.


After 18 minutes in a 375°F oven, they were lightly golden and passed the toothpick test. I let them cool in the pan for a few minutes (another suggestion in the recipe!) while I did some dishes, then popped them out and set them on a wire rack to cool completely.

I love how baked banana things get these big bumps on them. They're like banana camels.


At this point, I wished you could photograph scents because daaaamn, these smelled fine.

And then I waited impatiently for this morning when I could eat one for breakfast as I ran out the door to work.

Literally, I took a bite, took a photo, threw it in a Ziploc bag and ran out the door. And then I finished it at my desk.


Okay, so here's my new way of doing this:

Pros:
+ really simple recipe;
+ no refined sugar;
+ no added fat;
+ no salt;
+ extremely moist;
+ not too dense or heavy, like other banana baking can be;
+ a good way to use up fruit you wouldn't otherwise eat.

Cons:
- a little short on flavour.

I think next time, I'll use another banana and more apple/pear sauce, plus some more cinnamon and a bit more honey. The idea, I guess, is to keep the muffins healthy but punch up the flavour. These still made a really great breakfast, even if you do eat it running out the door.

Recipe

This is the recipe I used for these muffins, not the recipe I plan to use in the future.

Honey Banana Muffins
1 1/2 cups all-purpose flour
1 teaspoon baking soda
1/2 teaspoon ground nutmeg
1/2 teaspoon ground cinnamon
2 eggs, lightly beaten
3 ripe bananas, mashed
1/3 cup unsweetened pear sauce
3 tablespoons honey

×××

Preheat oven to 375°F and lightly grease a muffin tin. In a large bowl, combine the dry ingredients. In a separate bowl, combine the eggs, banana, applesauce and honey and mix into the dry ingredients, just until moistened. Fill muffin cups to two-thirds full with batter. Bake for 15-18 minutes or until a toothpick comes out clean. Cool for 5 minutes before removing from the pan to wire racks.


Seriously, can you believe how simple that is?!

Guten Appetit!
Continue reading...

June 15, 2008

Strawberry Chocolate Pie


My older sister's birthday was on Friday and her husband planned her a surprise party for today (Sunday). Since her friend offered to make cake, I took my cue from the just recently fresh Ontario strawberries and made a pie yesterday. For a while now, I'd been eyeballing this recipe for raspberry and white chocolate pie, and waiting somewhat impatiently for the berry season here in Ontario to begin. The original plan (I guess... do bakers make plans? Because really, it's sort of whatever I feel like, whenever I feel like it, rather than planning to make specific things) was to make it for Anders, because he loves white chocolate and I don't know many other people who do. Instead, however, I substituted raspberries for strawberries and white chocolate for dark chocolate. And some of the amounts of ingredients were changed significantly and the baking time was way longer, etc., etc., so essentially it's a mere version of the original recipe, but I digress.

I started by making my olive oil pie crust. This, I thought, would be a far sight more difficult than the previous time I made it, because we've had this hot, humid, disgusting weather here. But it turned out just fine.If you'll think back to my recipe for olive oil pie crust, you'll recall that the olive oil has to be frozen before beginning. I put a little bowl full in the freezer in the morning while I waited for Every Kilowatt Counts people to come pick up our old fridge.

See? Old fridge...


New fridge... <3.


Anyway, the fridge people didn't come, and when my parents got home from grocery shopping, I had a shower, ran some errands (which included going to buy some new stainless steel frying pans that Anders and I were going to buy the night previously except that the power went out in the store before we had a chance!), left my camera on the kitchen table and found this gem on it today:


(yea, that's a squirrel, totally flaked out on the top of our fence)

and came back to get started.

By that time it was about 4.30PM. And my olive oil was like a brick. A round, smooth, oily brick...


It shouldn't look like this. If it turns pale yellow, it's too frozen. You won't be able to get it out. Just give it a few minutes (especially if your summers are as gross as the on the summers in Southern Ontario) and it should pop out, though. Don't microwave it. You will regret that.
Me? I didn't give it long enough and was using my pastry cutter on it for aaages before it finally mixed into the other ingredients.

Eventually I ended up with this pleasant lump of dough:


And instead of putting it in the brand new fridge for an hour, I put it in the brand new freezer for half an hour:


While I waited (I set the timer on my oven because my skill for estimating the passage of time is not very well developed), I hulled and washed these beauties:


and admired my new pie plate ($10 at Wal-Mart!):


I also looked up some information of baking a pie blind, because I couldn't for the life of me remember ever having to do it before yesterday. While I was looking at that information, I came across some "techniques" for rolling out dough. I tried one, where I put the dough between two pieces of parchment, but the paper was quickly discarded and instead I rolled it out on the floured, crappy counter top in my kitchen with my lovely marble rolling pin. This brings me to my only gripe with this dough. It's really elastic. You absolutely need a heavy rolling pin and some patience. It pays off, though. It rolled out so perfectly in the end that I didn't have to patch any spots and it didn't stick to anything. Is it possible to be in love with pie dough?

Right, so putting it in my new pie plate was pretty exciting too:

Don't make fun, I've never been good at crimping edges.


For those of you who don't know, to bake a pie blind you need to weight the centre so it doesn't puff up or shrink too much. I just gently pressed in a piece of tin foil and filled the centre with about a cup of dry beans.


I also pricked it with a fork, just in case. I'm panicky like that.


It went in the oven for a total of ten minutes, but halfway through I carefully took out the tin foil and beans without spilling them all over the floor. Go Cathlin. By this time, my sister and her husband had showed up, and we had dinner reservations in about 45 minutes, so naturally I got to work on making chocolate curls. I had never done this before, and turned to Pioneer Woman. You could say that I want to be this woman when I grow up. I also would love if my blog would be as funny and popular as hers. Yea, that's pretty much how I felt all through high school, too.
Anyway, you can find her recipe and method for chocolate curls here. Basically, you throw a tablespoon of Crisco and three ounces of chocolate into the microwave and then mix them until they're.... well, mixed.
At this point, I would go look at Ree's. I did take photos but they're really bad. Plus, I don't have a pallet knife and ended up using a butter knife. It sucked. Seriously, go look at Pioneer Woman's. It's toward the bottom of the page. You won't be sorry.

So, by the time I'd gotten about half of the chocolate curls done, it was time to go for dinner, so I left my chocolate in the freezer, ate some quesadilla at Papagayo's, came back home and gave my sister her gift (in true kitchen-wench fashion, I got her a book of 1080 Spanish recipes), and then got back to my pie.

The filling couldn't have been easier to make, even if I did mess with the ingredients. I started by running some water into the bottom of a double boiler, and then melting eight ounces of chocolate (the recipe called for four) in one cup of whipping cream (the recipe called for 3/4 cup) in the top.

This is what chocolate melted in whipping cream looks like:

Yea, I tasted that deliciousness a few times...

Then I lightly beat an egg, and added the chocolate mixture in, steadily but slowly, until it looked like this:

Now, the recipe said to make sure not to incorporate air. I don't know, mine looks like it had air incorporated.


Let that mixture sit for a minute, and arrange a bunch of strawberries on the bottom of your cool pie shell (I used almost two cups).


And then drown those suckers in chocolate, wahahahahaha!


Okay, so this is where the recipe really didn't work for me: the baking time. Perhaps with four ounces of white chocolate, 3/4 cup of whipping cream and one egg, the 35 minutes suggested baking time would have been sufficient. But when I looked at my pie at 35 minutes, it was still liquid. Completely liquid. So I turned the oven up from 325°F to about 400°F and let it go for about another 30 minutes. At that point it was still sort of jiggly, but it looked baked. I've been puzzling about what to suggest for baking temperature and time all day and I think next time I'll try 400°F for 35 minutes. Of course, I'll be checking it constantly.

By the time the damned thing came out of the oven, it was midnight, so I didn't take any photos. I just went to bed.

This morning when I woke up, it looked like this:


I sliced the leftover strawberries in half and instead of arranging them neatly on top (which is what I did at first and it made me feel like a stuffy grandmother getting ready for a church bake sale), I dropped them on. All willynilly. I really let loose at 8.30 this morning. It was great.


Just don't do this on the brand new white tablecloth your mother just bought for the kitchen table.


Intermission while I shower, get dressed, get pretty, actually go to the party, eat and share the pie, take photos, come home, start my laundry and make my lunch for tomorrow.

What a day!

Okay, so I was sort of concerned about the inside of this pie. I was afraid when the first piece was taken out, it would just be liquid hangin' out in a pie crust. Not so. It was more the consistency of rich chocolate pudding. And the strawberries were so destroyed from being baked that they had almost completely disappeared into the chocolate. Certainly not a bad thing! It tasted like strawberry infused chocolate. Oh goodness, it was delicious. And a huge hit with the crowd, even the people who didn't really like dessert.


You should probably go make this pie right away. People will say things like, "you are a baking goddess/god" (I actually got that one today). If you don't have a mild ecstatic experience while you eat it, we probably shouldn't be friends.

Recipes

Olive Oil Pie Crust

2/3 cup of extra virgin olive oil
2 ½ cups of all purpose flour
1 teaspoon salt
1 teaspoon baking powder
½ cup ice water
1 tablespoon of vinegar
1 teaspoon to 1 tablespoon of sugar (REALLY optional, depends on what pie you're making)

×××

Place olive oil in the freezer until it solidifies and is of a consistency similar to cold butter, approximately 3 or 4 hours.
Combine flour, salt and baking powder into a bowl and mix. Add remaining ingredients and blend with a pastry blender. Place dough in an air tight container or plastic wrap and place it in the fridge for an hour or so to chill.
Roll ball out to 1/8 inch thickness and fit into a pie plate. Use as you would a regular pie crust. To bake it blind, fit a piece of tin foil into the pie crust, and pour in about 1 cup of dry beans. Bake at 425°F for five minutes, remove the beans and tin foil and continue to bake for another five minutes, or until evenly light golden brown.


Strawberry Chocolate Pie
1 cup whipping cream
8 ounces dark chocolate, chopped
1 egg, lightly beaten
2 cups fresh strawberries
Dark chocolate shavings
1 prepared pie crust

×××

Preheat the oven to 400°F. In a double boiler, gently melt the chocolate in the cream. Lightly beat the egg using an electric mixer on lowest speed. While beating, slowly add the chocolate mixture. Beat for 15 seconds more.
Arrange as many strawberries as will fit on the bottom of the pie crust with their pointed ends facing up. Gently pour the filling over the berries Bake until the centre is firm, about 35 to 40 minutes*. Let stand at room temperature for 3 to 4 hours. Just before serving, garnish with chocolate shavings and the remaining strawberries.

*I haven't tried this, so I don't know if it'll work, but it seems about right, based on my experience. Don't sue me if it doesn't work though!

Guten Appetit!
Continue reading...

June 07, 2008

Moderately healthy baking: olive oil-based cookies


Thursday was my five year anniversary with my boyfriend, and on Wednesday evening, having nothing else for him, I thought I would make some cookies... with a little switch up (am I like Anna Olson or what?). At first I was just going to try this recipe (scaled up to 24 cookies) which came highly recommended by the members of Bake! Bake! Bake!. But the more I thought about it, the less thrilled I was about the entire cup of butter these cookies would require. Now, I'm willing to endure a very full stomach and the prospect of weight gain over a sustained period of eating bakery cookies, whose ingredients are technically a mystery and whose fat content is not desirable to imagine. However, I always feel that one of my major goals in baking at home is to make food that is healthier than it would be if I were to buy it prepared.
Anyone who has followed this blog (mum, Ally...) will remember the first post I made included a pie crust made with olive oil. Taking my cue from this, I decided that instead of the melted butter the cookie recipe called for, I would substitute olive oil. Being that I was making these cookies the night before our milestone fifth anniversary and I was starting at 8PM (when I had to be in bed early for work the next morning), I was a little nervous about how the dough would turn out, but mostly certain that it would work just fine. The other thing about making these when I did was that I didn't get many photos, since I was sort of rushing through.

Anyway, without much further ado:


Cookie dough! As much as eating cookie dough is usually rather delicious, when it is made with olive oil, it's not quite as superb.


I'm a big fan of cookies that are all the same size, so I used a quarter cup measure to divide up the dough.


Mmm, fresh out of the oven.


Recipe

Olive oil based Chocolate Chip Cookies

Ingredients
2-2/3 cups all-purpose flour
1 teaspoon baking soda
1 teaspoon salt
3/4 cup olive oil
1-1/3 cups packed brown sugar
2/3 cup white sugar
1-1/2 tablespoon vanilla extract
2 eggs
semisweet chocolate chips, to taste

Method
Preheat the oven to 325°F. Mix together the flour, baking soda and salt; set aside. In a medium bowl, mix together the olive oil, brown sugar and white sugar until well blended. Beat in the vanilla and eggs until light in colour and creamy. Mix in the dry ingredients until just blended. Mix in the chocolate chips by hand. Drop cookie dough 1/4 cup at a time onto the cookie sheets. Bake for 15 minutes, or until the edges are lightly browned. Cool on baking sheets for a few minutes before transferring to wire racks to cool completely.

Honestly, this recipe couldn't be more simple. I was concerned that I would be working on the cookies forever, but all of the cookies were out of the oven by 9.15PM or so! It was great.
I was pretty sure, after making the olive oil pie crust that the olive oil in the cookies wouldn't interfere too much with the cookie flavour. For the most part, I was right. Certainly when the cookies were still warm, the olive oil was pretty easy to taste, but once they had cooled down, they tasted just like normal cookies, with a very slight olive oil after taste. This is not unpleasant at all. In fact, just knowing that it's healthy mono-unsaturated olive oil fat instead of saturated butter fat is a treat in and of itself.

Anders (and everyone else who tried them) loved them, too! As much as I love my grandmother's recipe for cookies, I think this will become my go-to.

Guten Appetit!
Continue reading...